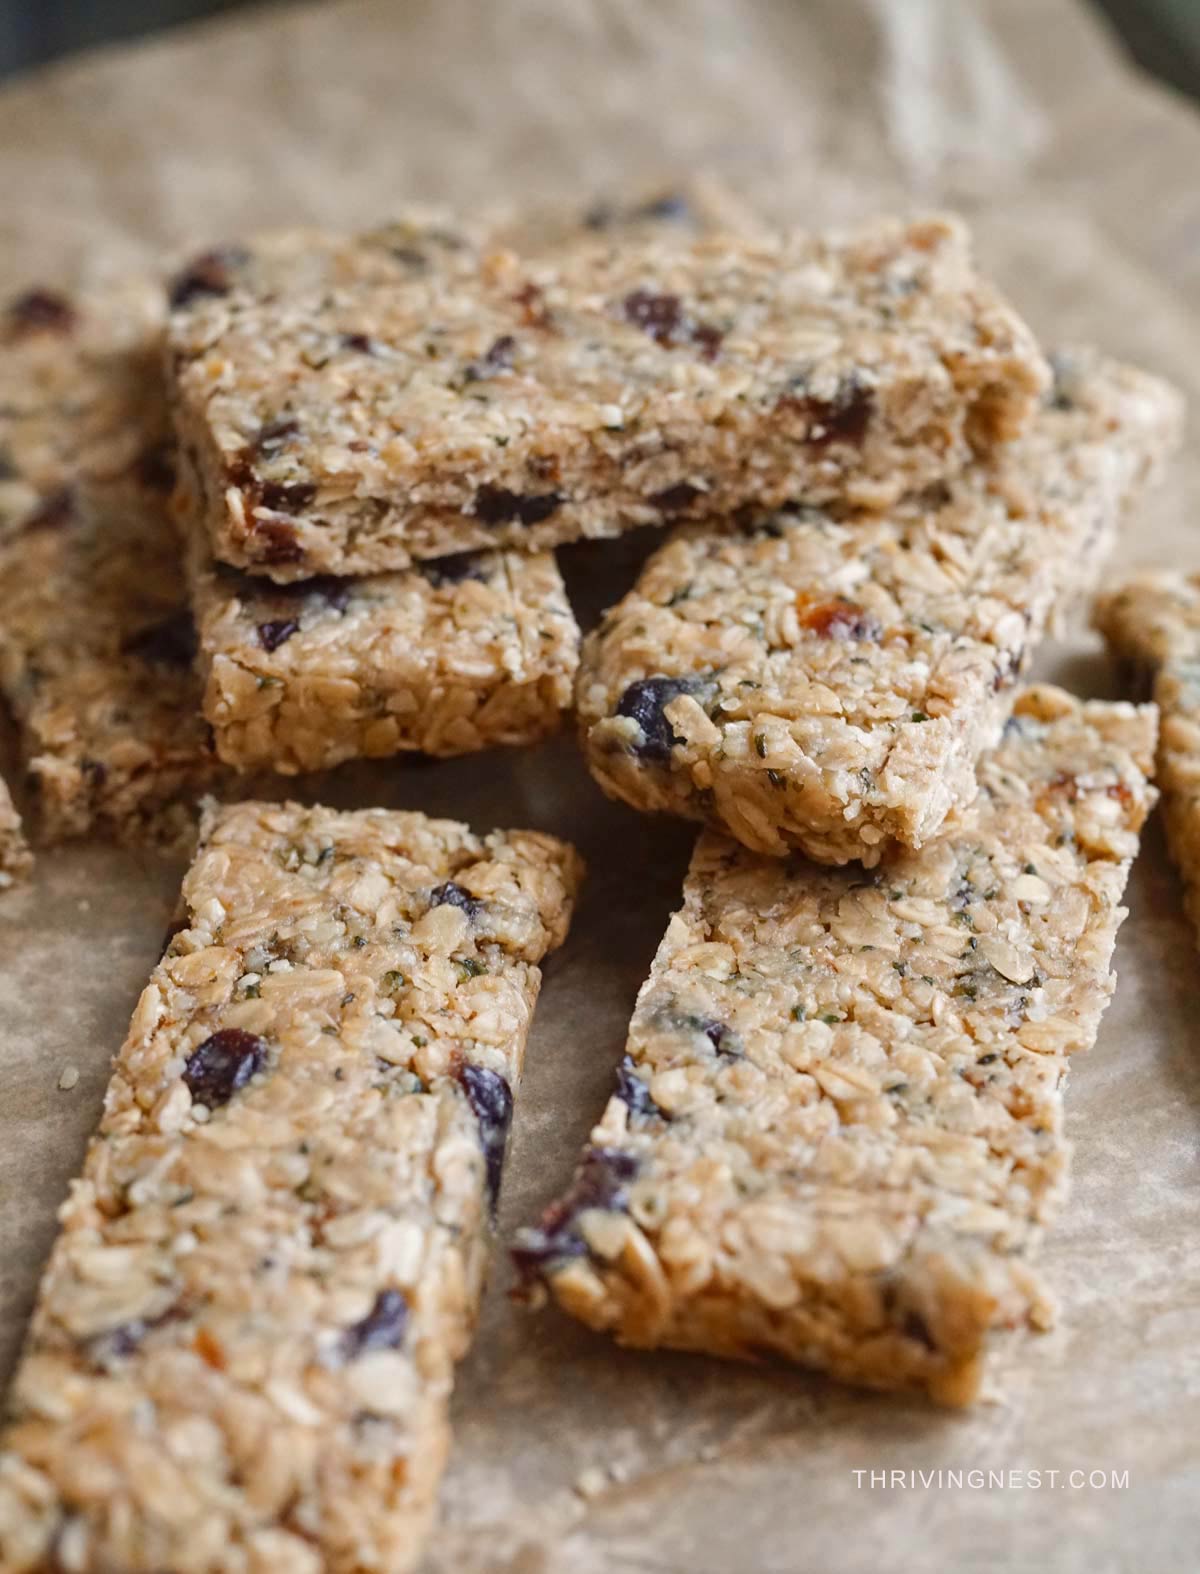
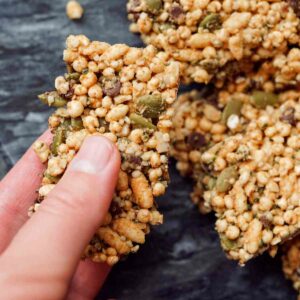
Chewy No Bake Snack Bars With Oats and Prunes
These no bake oat bars are a simple homemade snack made with real food ingredients: sprouted rolled oats, cashew butter, prunes, walnuts, hemp seeds, and maple syrup – no refined sugar, no additives, no oven needed. They are soft, chewy, naturally sweetened, and great for meal prep, lunchboxes, and busy weekdays. If you want a healthier homemade bar alternative to packaged bars without food additives, this recipe gives you that with very little effort.
Why I Make These Bars
- No baking required – mix, press, chill, cut. Done.
- Made with 7 real-food ingredients – all unprocessed and easy to find.
- Naturally sweetened with maple syrup or honey – no refined sugar.
- Packed with healthy fats, plant protein, and fiber.
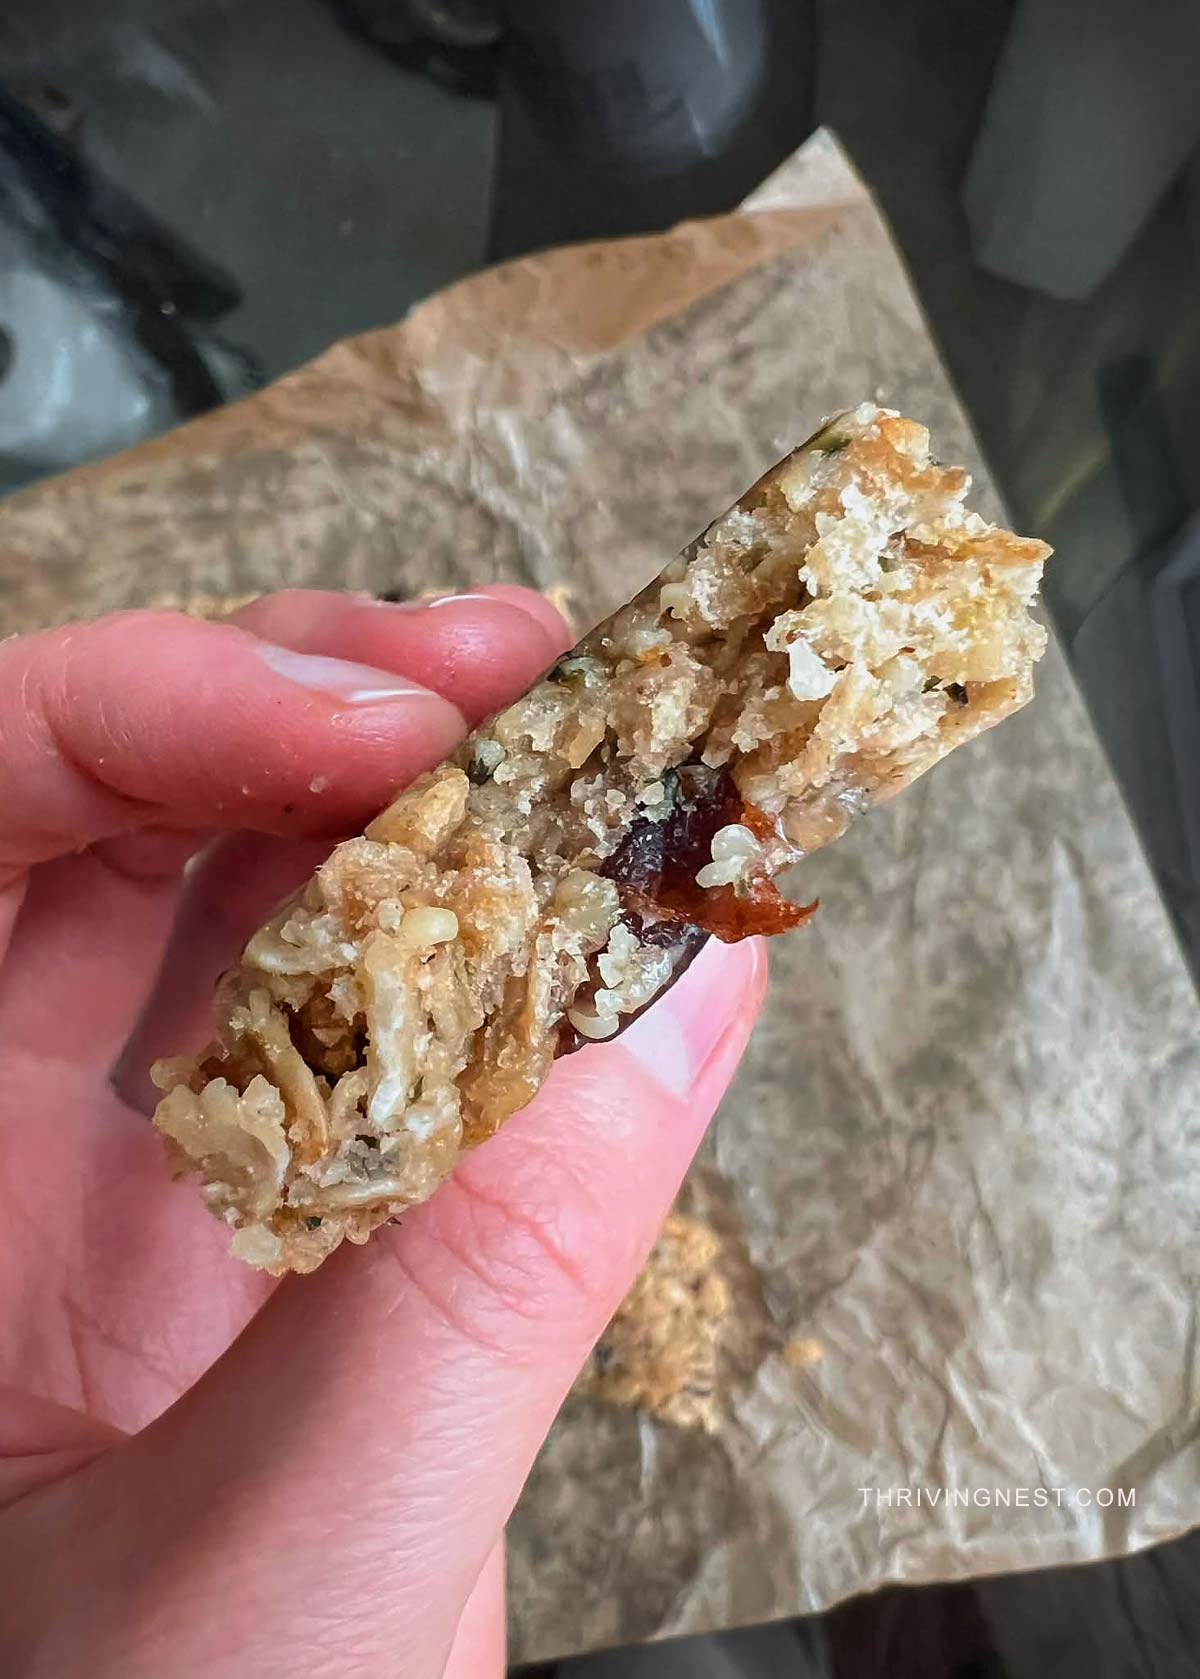
- Soft and chewy texture from prunes and overnight chilling.
- Great for meal prep – they keep well in the fridge or freezer for weeks.
- Kid-friendly and adult-friendly, so one batch works for the whole family (as snack for lunchbox) – check out my Lunchbox Ideas.
These bars came out of a real need: something quick I could grab as a snack, something I wouldn’t feel guilty giving my child, and something I actually enjoyed eating. The combination of sprouted oats, cashew butter, and hemp seeds hits all the right notes – steady energy without the crash, real flavor without the junk.
Most store-bought granola bars (even the “natural” ones) contain glucose syrup, palm oil, artificial flavors, or a list of preservatives you can barely pronounce. These homemade bars have none of that. When you make your own, you control every ingredient. And honestly? They taste better.
I also make my own granola recipe.
A lot of recipes online in this category lean on dates, peanut butter, chocolate chips, or baking. This version has a different feel. That makes these bars especially nice if you want something wholesome but not overly rich or candy-like. As an integrative nutrition health coach, I like recipes like this because they solve a real everyday problem: you need something quick, homemade, and filling that does not come from a wrapper full of extras you didn’t ask for.
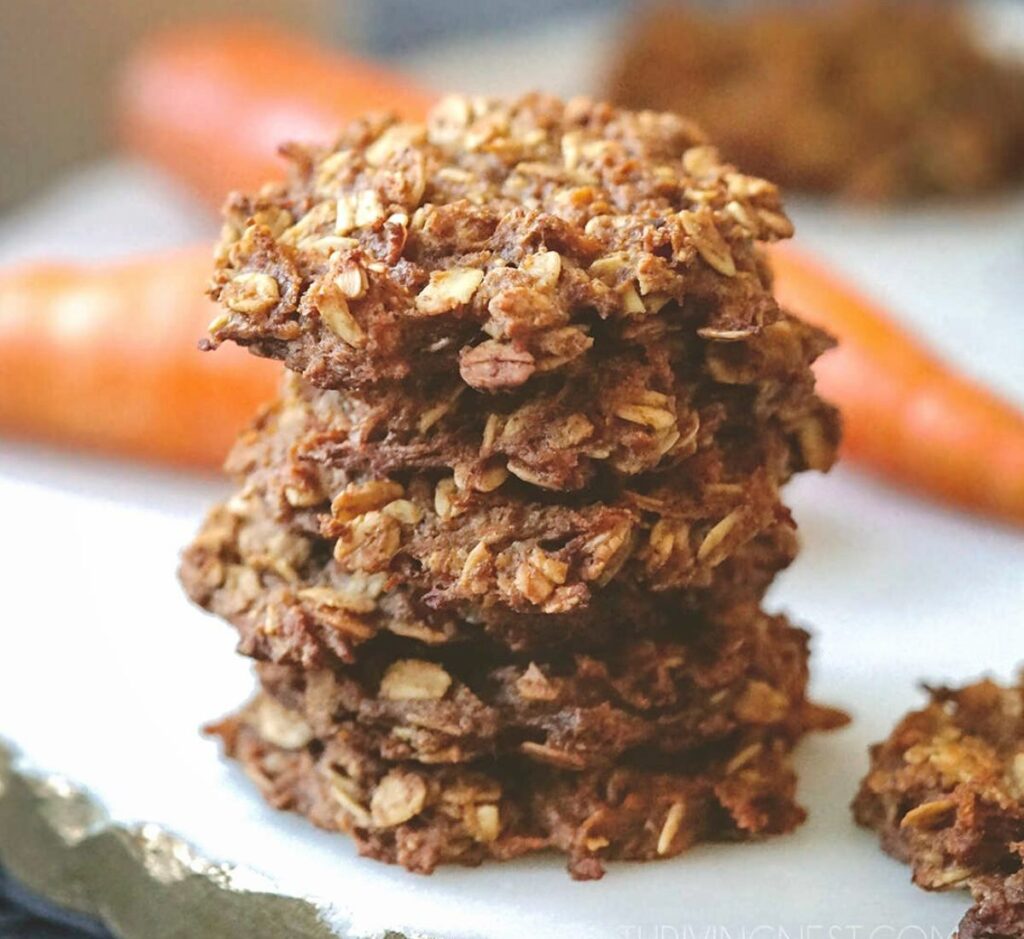
My Healthy Oat Carrot Cookies are another great option for lunchboxes or after-school snacks.
What Makes These Snack Bars Different
Most no bake bars are either very sticky, too sweet, or they fall apart. This recipe works well because each ingredient has a job:
- Sprouted rolled oats give the bars body and chew. Sprouting breaks down phytic acid before the oats are rolled, which makes the nutrients more available for the body to absorb, and makes them easier to digest. They also have a slightly softer texture that works really well in no-bake recipes. I used organic gluten free sprouted oats.
- Cashew butter acts as the creamy binder and keeps the flavor mild (has a more neutral taste than peanut butter). Use a natural, raw unsalted variety with no added oils. Brands like Artisana or roasted like Maisie Jane’s.
- Maple syrup or honey helps bind the mixture and adds a little extra sweetness. Both are real-food sweeteners, a much better choice than corn syrup or refined sugar.
- Prunes chopped small, act like sweet chewy little flavor bombs throughout the bar. They also bring natural sugars, potassium, and fiber. If you’ve never used prunes in a snack recipe, this might be the one that changes your mind. Use soft, pitted prunes and chop them to raisin size so they distribute evenly.
- Walnuts and hemp seeds add texture and make the bars more filling – adding a little extra protein and minerals without changing the flavor too much. Hemp seeds are one of the most complete plant proteins out there, they contain all 9 essential amino acids, plus a solid dose of omega-3 and omega-6 fatty acids. And walnuts are one of the best plant sources of ALA omega-3 fatty acids.
- Overnight chilling gives the oats time to soften, so the bars taste better the next day.
How to Make No Bake Oat Bars
What You Need:
- Large mixing bowl
- 9×9 inch baking dish
- 2 sheets of parchment paper
- Spatula or your hands
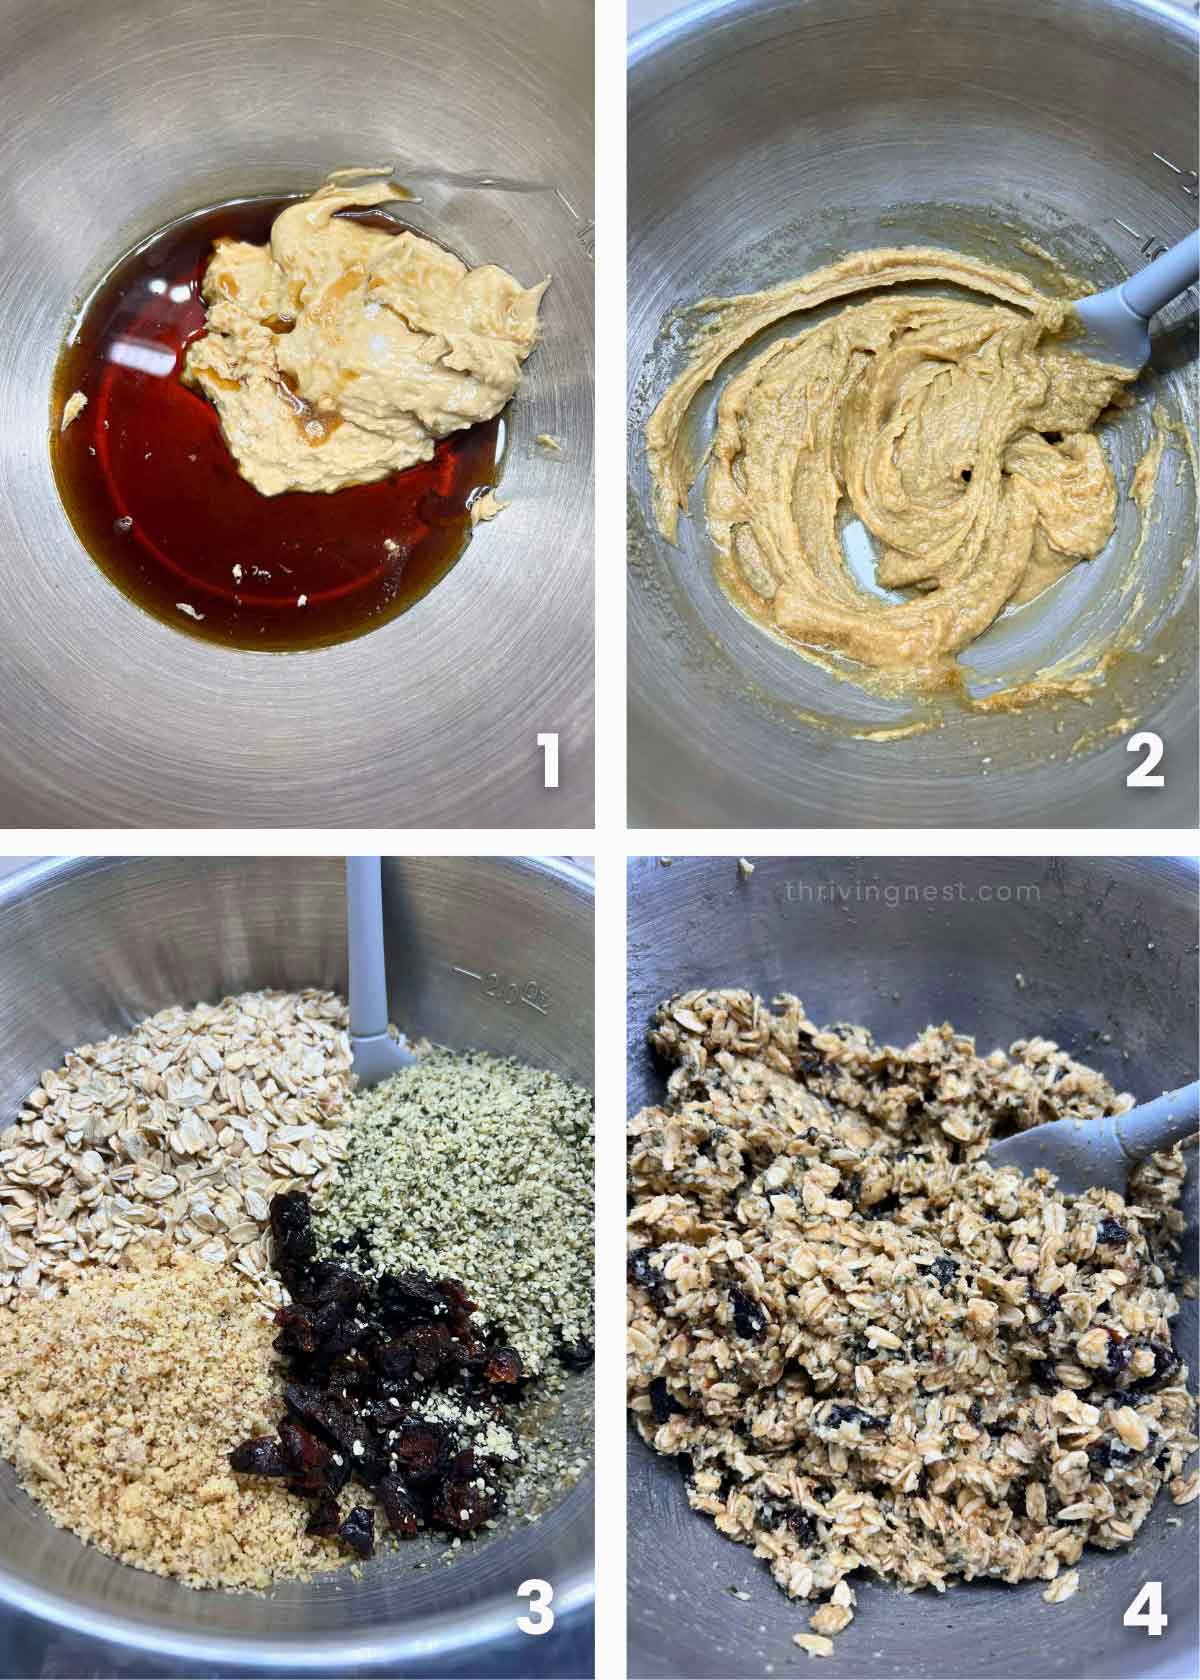
Step 1: Mix the wet ingredients
In a large bowl, combine the cashew butter, maple syrup (or honey), and vanilla extract. Stir well until smooth and fully combined. Doing this first ensures the sweetener doesn’t pool at the bottom when you add the dry ingredients.
Step 2: Add the dry ingredients
Add the sprouted oats, walnuts, hemp seeds, and chopped prunes. Chop the prunes small, about the size of raisins so they mix evenly and do not clump in one spot.
Mix thoroughly until every oat is coated and the mixture holds together when you press a small amount between your fingers. It should feel sticky and dense.
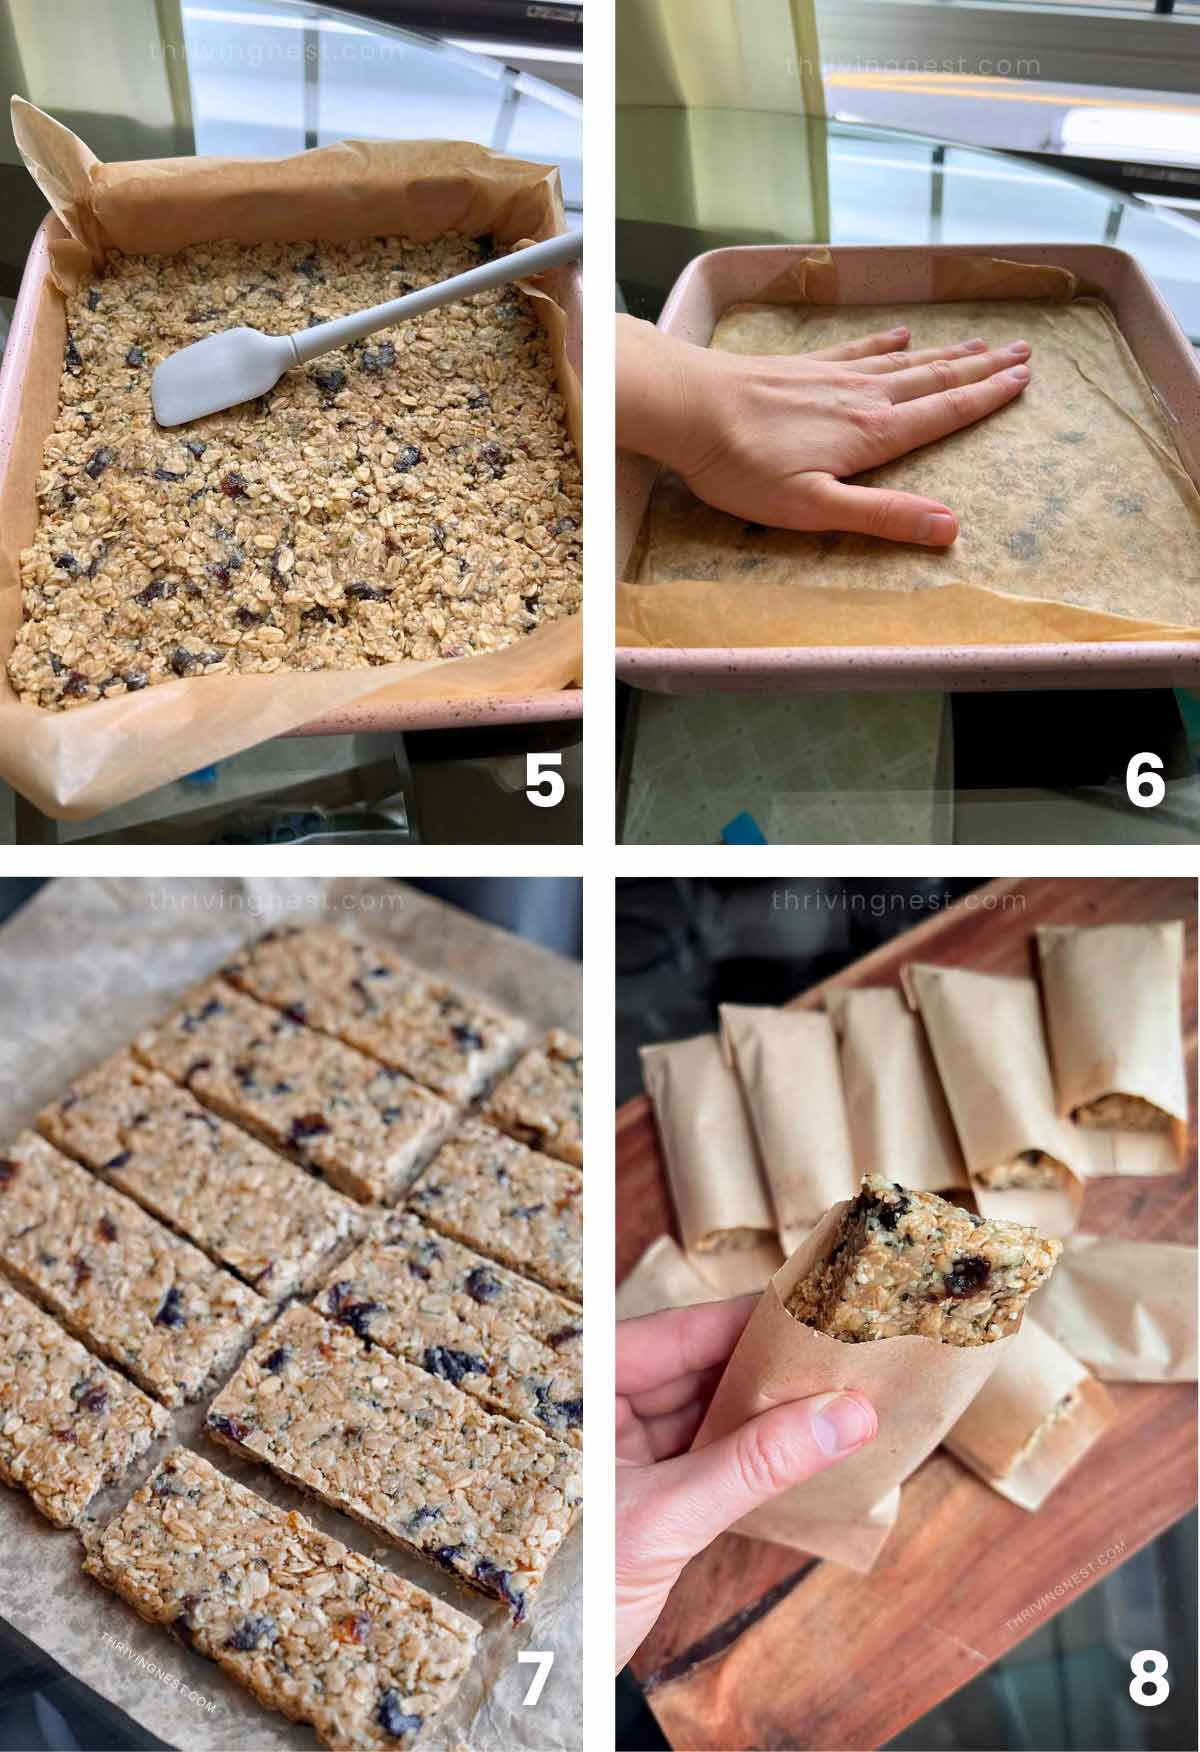
Step 3: Press into the pan
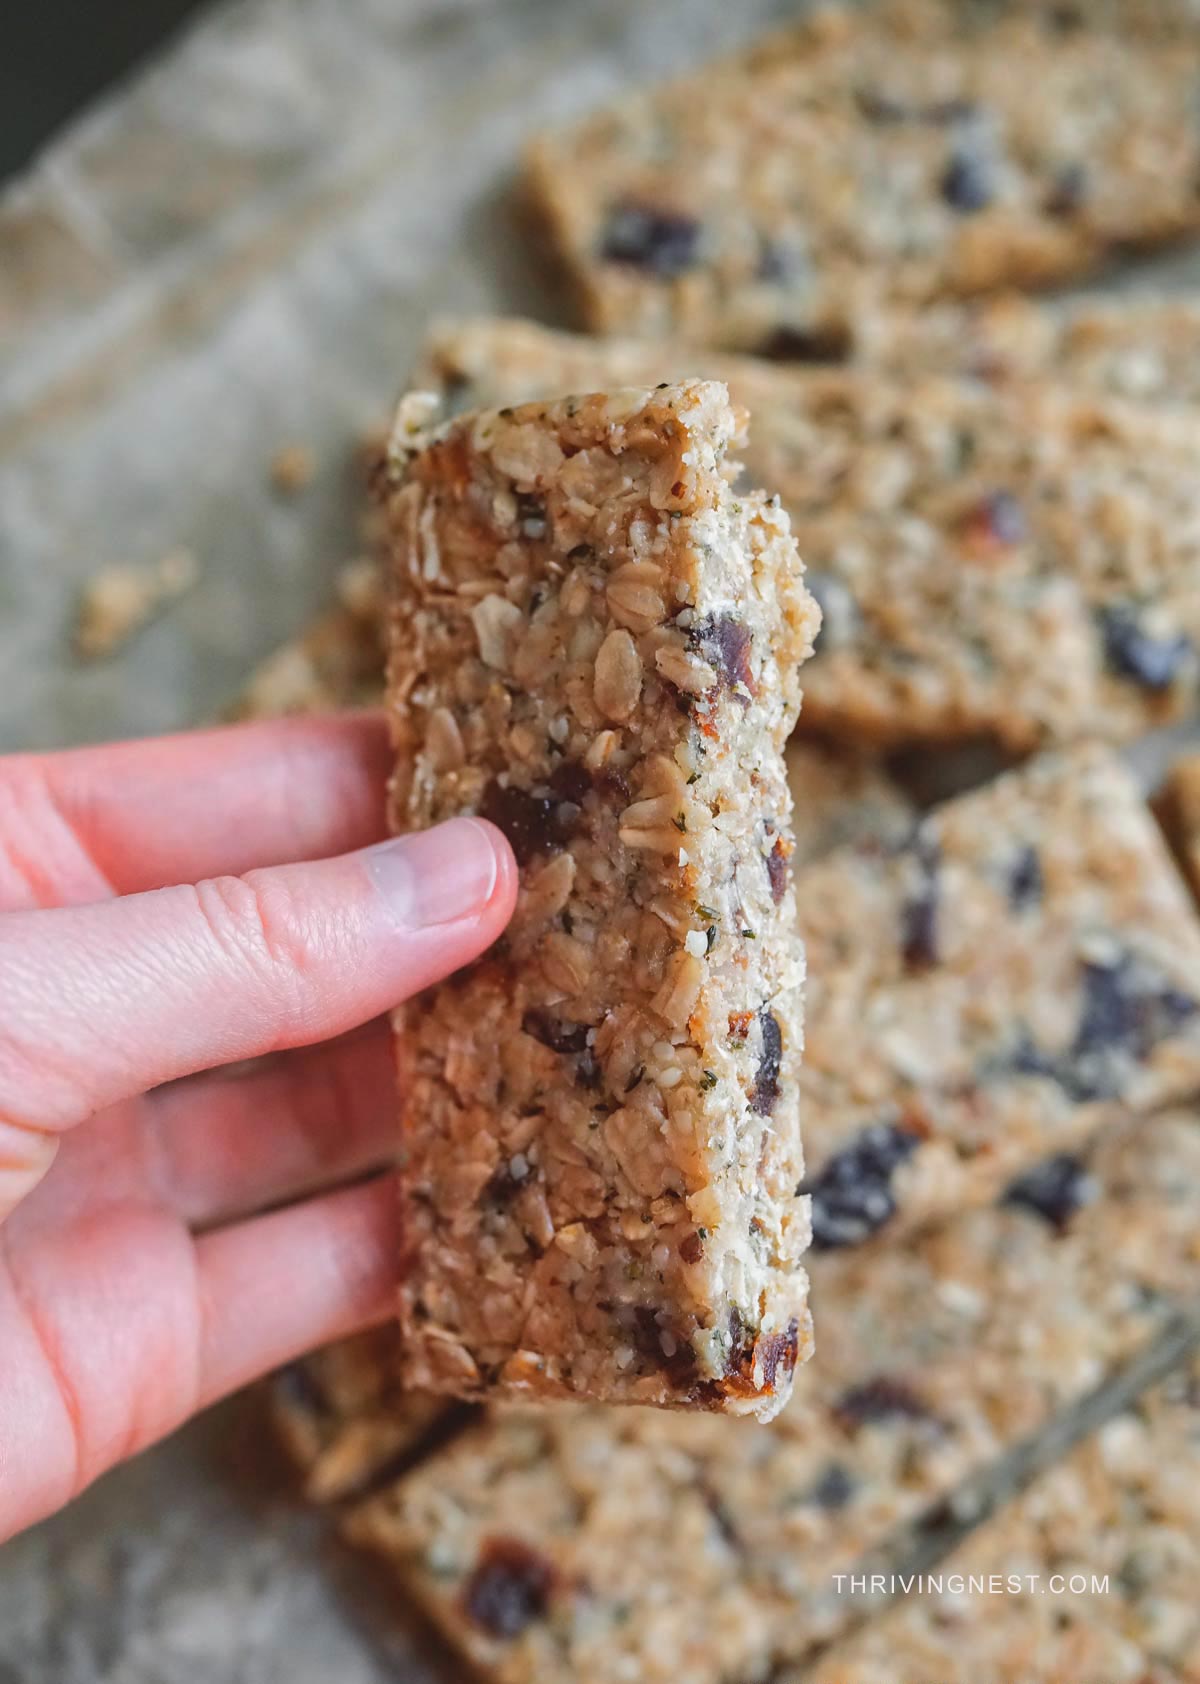
Line a 9×9 inch baking dish with a sheet of parchment paper. Spoon the mixture in and spread it out roughly with a spatula.
Place another piece of parchment paper on top and press the mixture down very well to even out the surface. Then carefully flip the whole dish over, using the parchment on both sides to hold everything in place, and press the other side to level it out. This gives you a compact, uniform slab that cuts cleanly later.
Step 4: Chill overnight
This step matters. The oats absorb moisture from the cashew butter and maple syrup as they rest, which transforms the texture from crumbly to chewy. Overnight is ideal. A minimum of 4 hours will work if you’re short on time, but overnight is worth it.
Step 5: Freeze before slicing
Before slicing, place the dish in the freezer for 1 hour. This firms everything up so you get clean, straight cuts instead of squished or uneven edges.
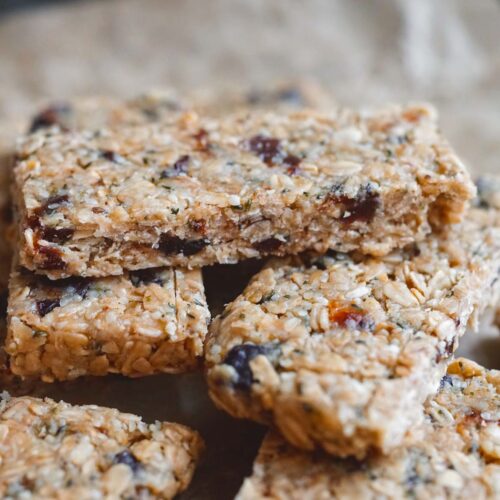
Step 6: Cut into bars
Remove from the freezer, lift the parchment-lined block onto a cutting board, and cut into 10 bars or 15 smaller ones, depending on how you like to snack.
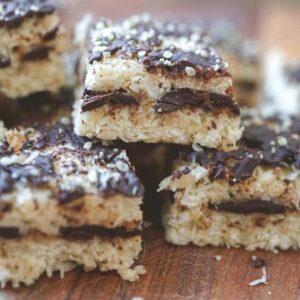
Best ways to serve them
- as a grab-and-go snack
- packed into school lunchboxes with fresh berries or apple slices
- after activities when kids need something filling
- as a simple travel snack
- as part of a light breakfast with yogurt or fruit
These bars are ready straight from the fridge or freezer. Pack them in beeswax wraps, small paper bags or small containers. They’re great for lunch boxes, hikes, road trips or a quick breakfast on busy mornings.
If your kids love these, my Homemade Cereal Protein Bars are another lunch box staple worth trying.
Healthy Swaps
| Original | Swap | Notes |
|---|---|---|
| Cashew butter | Almond butter, sunflower seed butter or tahini | Tahini gives an earthy flavor – great with honey |
| Maple syrup | Raw honey or date syrup | Date syrup is lower glycemic, adds caramel notes |
| Walnuts | Pecans, pumpkin seeds, sunflower seeds | Pecans are sweeter; seeds work for nut-free |
| Prunes | Medjool dates, dried cherries, raisins, cranberries, dried figs | Dates are stickier and sweeter |
| Hemp seeds | Chia seeds or ground flaxseed | Both add omega-3s; flax should be ground |
| Sprouted oats | Regular rolled oats | Slightly less digestible but still works |
Looking for a no-bake oat free snack in a different shape? These Protein-Rich Bliss Bites with chocolate flavor are made without oats but keep the cashew butter and prunes as staple ingredients.
Storage and Meal Prep Tips
- Fridge: Store in an airtight container or wrap bars individually in parchment. They keep well for up to 2 weeks.
- Freezer: Wrap each bar individually in parchment and place in a zip bag. Freeze for up to 3 months. Pull one out when you want, no need to thaw. They will just have a harder texture.
- Room temperature: Fine for a few hours if you’re taking them out for the day, but don’t leave them in a warm kitchen for more than 4 hours.
- Meal prep tip: Double the batch and you’ll have snacks sorted for the whole month. Use two 9×9 pans or one 9×13 pan. Individually wrap before freezing so you can grab one at a time. Make the batch the night before, let it chill overnight, and slice the bars the next morning after a short freezer rest.
FAQs
Yes. Regular rolled oats work fine here. Sprouted oats are more digestible and slightly more nutritious, but the texture and binding are nearly the same. Avoid quick oats, they make the bars too soft.
The overnight rest lets the oats fully absorb moisture from the cashew butter and sweetener. That’s what creates the chewy, almost fudgy texture instead of a dry, crumbly one. If you’re in a hurry, 4 hours minimum, but overnight gives the best result.
Usually not enough wet ingredients to bind the dry ones. Make sure you’re measuring the cashew butter accurately, it’s the main binder. Also check that you pressed the mixture firmly and evenly before chilling. Next time, try adding an extra tablespoon of cashew butter or a small extra drizzle of maple syrup.
Yes, about 1/3 cup of dark chocolate chips or cacao nibs mixed into the dry ingredients works great. Keep in mind they’re already sweet enough without chocolate.
Yes. Soft dates can work, but prunes give a slightly deeper flavor and help make the bars extra chewy.
They are best kept chilled. They can sit out for a short time, but the texture is firmer and cleaner straight from the fridge.
Chewy No Bake Snack Bars With Oats and Prunes
INGREDIENTS
- 2 cups sprouted rolled oats
- 2/3 cup cashew butter
- 1/3 cup maple syrup or honey
- 1 teaspoon vanilla extract
- 1/2 cup walnuts (finely chopped or coarsely ground)
- 1/2 cup hemp seeds
- 12 prunes (pitted and chopped to raisin size)
INSTRUCTIONS
- In a large bowl, combine cashew butter, maple syrup, and vanilla extract. Stir until smooth.If your cashew butter is very thick and stiff, warm it slightly (or keep at room temperature for a couple of hours before starting) so it blends more easily with the maple syrup.
- Add sprouted oats, walnuts, hemp seeds, and chopped prunes. Mix well until fully combined and the mixture holds together when pressed.
- Line a 9×9 inch baking dish with parchment paper. Transfer the mixture into the dish.
- Place a second sheet of parchment on top and press firmly to create an even, flat surface. Flip the dish and press the other side to level it out.
- Refrigerate overnight (minimum 4 hours) to allow the oats to absorb moisture and develop a chewy texture.
- Place the dish in the freezer for 1 hour before cutting.
- Lift the parchment-lined slab onto a cutting board and cut into 10 bars (or 15 smaller ones).
- Store in the fridge for up to 2 weeks or freeze individually for up to 3 months.
NOTES
EQUIPMENT
NUTRITION
Made These No Bake Oat Bars? Tell Me How It Went
I’d love to hear how yours turned out, did you swap any ingredients or add something extra? Leave a comment below. Your variations might inspire someone else’s next batch.
If you found this recipe helpful, share it with a friend who’s always looking for a healthier snack. And if you make them, share your experience. And if this recipe helped you, share it with a friend or save it for later so you have a healthier homemade snack ready when life gets busy.
More Healthy Snack Ideas


©ThrivingNest. Content and photographs are copyright protected and need prior permission to use. Copying and/or pasting full recipes to other websites and any social media is strictly prohibited. Sharing and using the link of this recipe is both encouraged and appreciated!